How to Refinish Hardwood Floors

Hardwood Floor Refinishing NJ clears the area of furniture & makes sure windows are open for proper ventilation. Also, apply painter’s tape to doors & vents to keep dust from affecting other parts of the house.

After sanding, stain the hardwood floors. HGTV recommends working in 3- to 4-foot sections for even staining.

flooring

It can take a while to sand a wood floor, especially if it has been previously finished. This is one of the reasons why it is best to have a professional handle this work if possible. However, if you must do it yourself, it is important to take the time to do it correctly. This will help you achieve a beautiful and long-lasting finish. Before you start sanding, it is important to thoroughly clean the floor. This includes sweeping it and vacuuming. It is also a good idea to mop it with water or a slightly damp microfiber rag. This will remove any dust or dirt that might mar the final coat of finish.

Start the sanding process by using coarse grit sandpaper. Start in the corner of the room and move slowly across the surface of the floor. Be sure to cover all areas of the floor, including baseboards and corners. Use a small hand sander to get into tight spaces like under radiators.

Next, sand with medium grit paper. This will smooth the rough patches and fill in any gouges that may have occurred during the sanding process. If you notice any large gouges, you should use wood putty to fill them in before sanding again. Once the floor is smooth, it is a good idea to vacuum and mop it again.

Once the floor is completely dry, you can sand it again with fine-grit paper. This will give the floor a smooth, even finish and prepare it for a stain or polyurethane.

It is a good idea to wear a mask and earplugs while sanding, as well as a respirator when applying a sealer or oil-based polyurethane. This is because these materials can generate a lot of harmful fumes.

If you are refinishing an engineered wood floor, make sure that the layer of real hardwood is thick enough to be sanded without hitting plywood underneath it. This is a common problem with engineered floors, and it can cause the finish to flake or peel in the future.

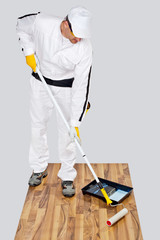
Staining can be one of the most rewarding aspects of a wood floor renovation, adding depth and beauty to the hardwood. But staining requires time, patience, and a thorough understanding of the process in order to achieve a professional-looking result. Before you start, remove any furniture and cover vents with painter’s tape to prevent stain from seeping into your HVAC system. It is also important to be prepared for the messiness of staining – make sure you have plenty of plastic sheets and a good supply of painter’s tape. And remember that it can take up to four days for the stain to dry/cure before you can walk on the floor or put your furniture back in the room.

There are two basic types of stain – dyes and pigments. Dye stain works a lot like paint, changing the color of the hardwood by absorbing into its pores. Pigmented stains, on the other hand, change the appearance of the grain by hiding it. It is very important to work with a reputable dealer or manufacturer to ensure that you have the right color of stain and that you understand how it will interact with your existing woodwork.

It is also important to pay close attention to the direction of the wood grain when applying the stain. Aside from avoiding cross-grain scratches, it is critical to avoid running the stain in the opposite direction of the grain, as this will cause unsightly “blotch marks” on the surface of your floor.

Once the stain is completely dry, it’s time for a polyurethane finish to protect your hard-earned investment. The process of applying a polyurethane can be relatively quick and simple, but the amount of time it takes to dry/cure will depend on the weather conditions in your area. High humidity, low temperatures, and using too much finish can all lengthen the drying time significantly.

Before applying a finish, vacuum the floor thoroughly and wipe it with a tack cloth. You must remove all dust, hair and other debris that could mar the final look of your hardwood floors. If your flooring is waxed, you must strip the wax or have it professionally stripped.

You can choose to apply a water-based polyurethane or lacquer. Water-based finishes dry quickly, but they may require more coats than oil-based finishes. It is a good idea to follow the manufacturer’s guidelines for application. You will want to have the room well ventilated and use a respirator if the product you’re using emits fumes.

If you are refinishing your hardwood floors to replace them with a new floor covering, you’ll need to apply several coats of polyurethane or a traditional varnish. A traditional varnish dries much slower than a polyurethane, but it will produce less fumes. A traditional varnish also has a more dramatic effect on the wood and darkens it considerably.

After sanding, you can stain the hardwood floors to match your décor. Stain is available in many colors and can be applied to the whole floor or in small areas. Use a foam applicator pad and work in small sections at a time. If the stain has a tint to it, you should lightly rub the stained area with 120-grit sandpaper and then rinse it off to get rid of the color.

Before you apply the topcoat, you must allow the stain to dry. This usually takes about three hours, depending on the humidity and temperature of the room. You can then reattach the quarter-round molding and furniture, and you can enjoy your newly refinished hardwood floor. To ensure the proper sheen, it’s recommended that you apply two to three coats of the finish. You must allow the first coat to completely dry before applying the second and third. After applying the last coat, you should wait about a week before you can walk on the floor without shoes. If you’re unsure of how to refinish your hardwood floors, consult with a professional flooring contractor.

After a wood floor is refinished, proper care is essential. Regular vacuuming removes tiny abrasive particles that scratch the finish and should be done daily in high-traffic areas. Sweeping and dust mopping should also be done regularly to keep abrasive dirt and grime from scratching the floor surface and dulling the finish. Periodic cleaning is recommended with a cleaner made specifically for hardwood floors and preferably a combination cleaner/wax, such as the products manufactured by Minwax. The frequency of cleaning varies from one household to another and depends on the number of people in the home, whether children and pets are present and how much traffic the room receives.

Furniture legs should be placed on a set of felt pads to protect the wood from scratches and gouges when furniture is moved across the floor. Avoid using plastic casters that can leave abrasive scratch marks on the floor, and replace them with soft rubber or polyurethane casters. Don’t drag furniture across the floor; this can scratch, dent and compress the finish, and it can also cause moisture to seep into the cracks of the wood and swell, which can stain and warp the finish.

Spills should be cleaned up immediately to prevent stains and damage to the finish. Don’t use oil-based cleaners on prefinished or new wood; vinegar can damage the finish and create an oily film.

Deeper scratches, scuffs and other discolorations can be repaired with a touch-up kit for urethane finishes, available from any wood flooring retailer. The kit contains a small amount of the original stain color, which can be mixed with a urethane cleaner to restore the finish.

Wood is a photosensitive product that darkens or lightens over time. Proper species selection and finishing helps minimize this effect, but it is unavoidable to some extent. Regularly moving or rotating area rugs helps to spread the darker areas evenly throughout the room. Maintaining a stable humidity level is also helpful for maintaining a uniform color.

Modern Log Home Styles

Richardson Log Homes LLC offer a unique alternative to cookie-cutter subdivisions. With their natural beauty and versatility, they blend right into the landscape.

Moisture is a major concern for log and timber homes. Rain, snow, humidity, and damp locations can cause wood rot. Preventative maintenance, including staining and chinking, is essential.

Some people need more confidence about the upkeep required for log homes. However, a properly cared-for log home is easier than any other type of house.

Log homes are iconic and often conjure images of rustic cabins surrounded by wooded or mountainous landscapes. They’re also known for their warmth and cozy feel that will comfort those living there. But these days, log home construction can take a more modern approach to style and function. If you’re thinking about building a log home, it’s important to consider your overarching design aesthetic and how you would like the space to look. To help you start your planning process, we’ve gathered some examples of current log home styles that range from traditional to mountain-modern.

Solid log is a common log home style that features full-length, hand-peeled, round, and square-cut logs that are joined together to form the walls of your cabin. This construction style is typically more cost-effective than other types of log homes.

Traditionally, solid-log homes feature an open floor plan with vaulted ceilings and plenty of natural wood elements. These classic designs can be adapted to fit more contemporary lifestyles using different finishes and furnishings.

For example, this log home uses an interior wood staircase with a contemporary design that complements the rustic feel of the exterior. It also utilizes a variety of subtle lighting to make the space feel more modern while still feeling warm and cozy.

Bunk beds are a great way to save space in a log home. However, they don’t have to appear childish like this bunk room. Choosing a darker stain for the bunks helps the room to feel more grown-up and mature.

In addition, many log homeowners use modern materials and finishes. For example, many homeowners opt for radiant heating in their log homes instead of furnace-based heating. This provides an added layer of comfort, especially in the colder months.

Some homeowners hesitate to own a log home because of the required maintenance. But in reality, upkeep is relatively easy than taking care of any other type of home. Following the manufacturer’s and stain/sealant provider’s recommendations, you can keep your log home looking its best with minimal effort.

Log homes come in a variety of styles and configurations. Some are traditional solid logs, while others are built from Engineered Logs or Timber frames. No matter what home style you want, a good log builder will work with you to understand your unique needs and design the perfect house for your lifestyle.

The natural insulating qualities of wood are what make log homes energy efficient. As a result, many people find that they can cut their energy bills significantly by moving to a log home. Whether you are building a new log home or renovating an existing one, there are several ways that you can increase your log home’s energy efficiency.

The most important step is ensuring your log home is properly sealed. Using a moisture membrane, chinking, and insulation will help keep cold and warm air out. It would be best to consider using low-flow faucets and showerheads in your home to reduce water consumption. In addition to saving money on your energy bill, you will reduce the amount of carbon dioxide in the air.

If your log home is old, you likely don’t have much insulation in the house’s walls. If this is the case, having the wall insulation upgraded with polyiso is a good idea. It would help to consider adding insulation in the basement and attic.

Another way to save energy costs is by installing a solar power system. Having a professional evaluate your home’s energy needs and determine the best type of solar system will help you save even more on your energy bill.

Many states have enacted laws that exempt log homes from normal energy compliance standards. This is because a log wall doesn’t have the same insulating properties as a conventional wood stud, sheathing, and drywall (which typically has an R-value of about R-21). However, some states require that your log home have at least an R-19 insulation. If this is the case in your area, adding this insulation as soon as possible is a good idea.

Log home living is a lifestyle of enjoying nature’s beauty while staying protected from rain, snow, sun, and wind. Whether built by a professional or as an owner-builder project, log homes are designed to last centuries with proper care and maintenance. A well-constructed log home will often outlast traditional masonry and concrete homes.

A well-crafted log cabin can be built in a shorter timeframe than standard houses because of the unique construction method. Both stacked and post and beam log construction offer flexibility in design, with open-concept floor plans, walls of windows, intricate roof trusses, and soaring fireplaces. These features can also make log homes easier to maintain since there are fewer areas where dirt can gather.

Like all wood, logs are susceptible to moisture damage, so it’s important to have a plan to avoid mold, mildew, and rot. A good quality stain, which dries and seals the wood, is essential to protecting your logs. You’ll also want to protect your logs from the ground by using chinking or caulking to fill in gaps as they swell and shrink.

Another way to protect your logs is with a wide-ranging pest control program. This includes regular termite treatments with liquid formulations containing borate and dust containing permethrin and cyfluthrin. Using a pest management professional is a good idea, as this is one area in which many log homeowners struggle.

The longevity of a log home depends on the quality of the materials used, how it is constructed, and ongoing maintenance. The logs must be the right species and properly seasoned, and all seams and joints must be sealed. Otherwise, you will lose the airtight seal you need for energy efficiency. Other potential problems include using the wrong type of logs, inadequate foundation support, settling, and improper maintenance. These issues can lead to doors that don’t open or close, drywall cracking and separating, floors swaying, and more. A professional log home builder can help you avoid these problems with a thorough building analysis and planning process.

Many people dream of owning a log home for years before they can. When that time comes, they have a clear vision of how they want their house to look from the outside. They also know exactly what type of lifestyle they want to enjoy inside.

But they might need to realize they have a great deal of flexibility to create a unique home that meets their needs and tastes without going over budget. For instance, the design of a log home can include different types of wood for the exterior walls, or they can add porches and verandas, which will make their home feel larger and more open.

Another way to increase the space in a log cabin is to include more lofts and dormers. This will create more open living and entertaining spaces while still giving the cabin a cozy and inviting feel. Additionally, using components that keep maintenance chores to a minimum, such as vinyl-clad tilt-in windows that don’t need painting, can help reduce your long-term maintenance costs.

Regarding interior design, log homes are as flexible as any other house. They can incorporate modern amenities such as an open-concept floor plan, high ceilings, and a spacious kitchen. Additionally, using natural building materials, like hickory or pine, can give a log home a more modern feel.

In addition to interior design, log homes can be adapted to meet energy-efficiency standards. Adding extra insulation and using low-VOC stain and sealant can significantly decrease energy bills. Additionally, the natural construction of a log home can prevent off-gassing from chemicals found in some artificial building materials.

If you want to learn more about the possibilities for a custom log home, contact Gingrich Builders today. We have a large portfolio of plans that can be customized to suit your preferences and budget. We’re happy to answer any questions that you may have and help you create a dream log home for your family!

Navigation